JEWELRY BOX TUTORIAL
By Budge Aquino
Materials:
- Linen board
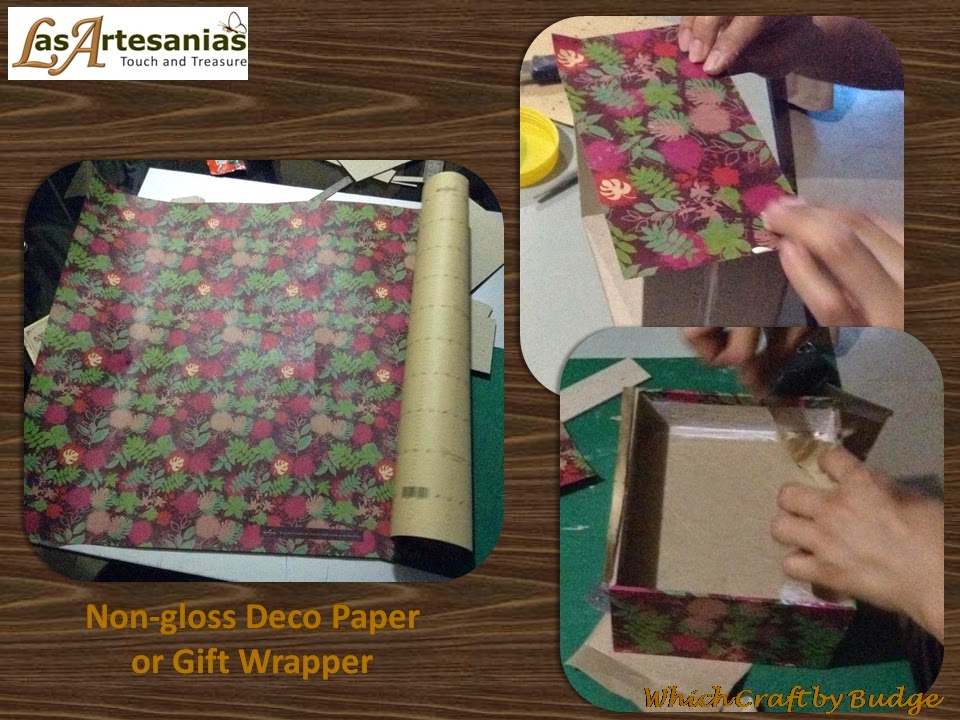
- Non-glossy deco-paper or gift wrapper
- Recycled brown paper pouch
- Paper pack & bookmark
- Tacky glue & white school glue
- Corrugated paper sheet
- Decoupage fluid
Material Cost: ~Php 45.00
Tools:
- Scissors
- Cutting blade
- Ruler
- Cutting mat
Duration: 1 hour 30mins (it took me even longer to compose this blog)
Procedure:
1. Cut the linen board to desired size of the box. Make sure to consider the allowance for the thickness of the board.
For this project, I used 1/8" thick linen board
Box dimension:
Length, 7"
Width, 6"
Height, 4"

2. Using tacky glue (I have my own DIY recipe for tacky glue), put the pieces together, creating two decks .

3. Instead of buying brown paper, use recycled paper pouch to cover the inner surface of the lower deck. Tip: use brush to apply white glue evenly. It's a bit tricky, too much glue would cause the paper to warp. (I also have my DIY white glue)

4. Apply tacky glue to the edges of the lower deck of the box and attach the upper deck.

5. Cover the outer surface of the box with non-glossy deco paper or gift wrapper. I used Hallmark gift wrapper that I bought from National Book Store, these are limited edition and every time they have new design, I hoard (Papemelroti got great wrapper designs too). Cover the inner surface of the upper deck with recycled paper pouch. Once again, make sure to apply white glue evenly.
6. Applying same technique used for the box, create box divider and attach to the upper deck using tacky glue.

7. For the cover design, I used paper pack & bookmark from Papemelroti, and sticked them at the cover base.

8. Stick strips of linen board in between the cards to give that shadow frame effect.

9. Match the openings of the frame for box cover with the arrangement of the cards.

10. Cover the outer surface with deco-paper or gift wrapper. Make sure to have allowance at the edges of the frame. Cut the paper at the openings, leaving portions which are to be glued inwards.


11.Attach the frame to the cover base,and glue the paper edges inwards leaving the portion which will be attached to the box using tacky glue. Although tacky glue could prevent paper from tearing, sticking another piece of paper at the box and cover joint makes you worry free.

12. Applying same technique used for the box, create drawers and button handles. You may use metal button handles, I've seen some in Wellmanson.

13. Cut strips of corrugated paper sheet and stick them to the edge of the cover and button handles.

14. Apply decoupage fluid all over the inner & outer surfaces and you're done.

I hope you learned from my simple tutorial. Share your projects too. For more arts & crafts projects, visit my Facebook & Pinterest accounts:
Las Artesanias FB Page - https://www.facebook.com/LasArtesaniasdeReina/
Budge Aquino FB Account - https://www.facebook.com/berncathy993
Budge Aquino Pinterest Account- http://www.pinterest.com/berncathy993/boards/
More tutorials coming up. If you have any tutorial request, just let me know, leave private message in my Facebook account and I'll be grad to hear from you.